
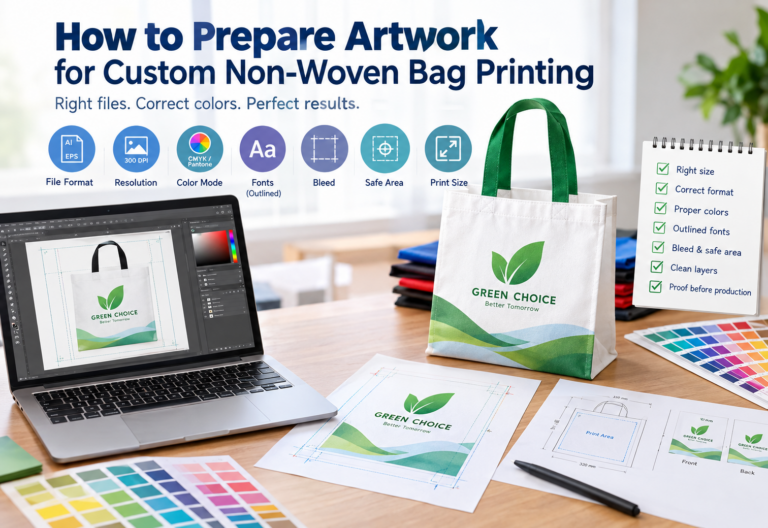

A good custom non-woven bag starts with good artwork.
For B2B buyers, artwork preparation is not simply a design task. The artwork file directly affects printing quality, color accuracy, production efficiency, and whether the factory can move the order into production without unnecessary revisions.
A logo that looks perfect on a computer screen can still produce unexpected results when printed onto non-woven fabric.
Common problems include:
- Blurry logos
- Incorrect colors
- Missing fonts
- Text that is too small
- Artwork placed too close to seams or handles
- Low-resolution images
- Incorrect print dimensions
- Gradients that do not reproduce as expected
- Different results between the approved design and finished bags
The good news is that most of these problems can be avoided by preparing the artwork correctly before production.
This guide explains how to prepare artwork for custom non-woven bag printing, what files to provide, how to handle colors and fonts, and what B2B buyers should confirm with their manufacturer before approving mass production.
Why Artwork Preparation Matters for Custom Non-Woven Bags
Non-woven bags are different from smooth paper packaging.
The surface of PP non-woven fabric has a textile-like structure, which can affect how fine details, colors, lines, and small text appear after printing.
The printing method also matters.
Screen printing, heat transfer, digital printing, flexographic printing, and laminated printing may have different artwork requirements. For example, screen printing commonly works best with vector artwork and clearly defined colors, while full-color processes can have different file and color requirements.
That means your designer should not simply create a beautiful digital mock-up and send it to the factory.
The artwork needs to be prepared for the actual bag size, material, printing method, and print area.
1. Start With the Correct Bag Specifications
Before opening Adobe Illustrator, Photoshop, or another design program, confirm the actual bag specifications.
At minimum, ask the manufacturer for:
- Bag width
- Bag height
- Gusset depth
- Material
- GSM
- Bag color
- Printing method
- Number of printing sides
- Maximum printing area
- Handle position
- Seam and stitching locations
- Required bleed
- Safe area
This is one of the most important steps.
Different bag sizes can have different printable areas, and the available space can also be affected by seams, handles, gussets, and construction.
Some non-woven bag printing suppliers provide specific templates showing the printable area and safety boundaries for each bag size.
Do not design the final artwork before confirming the production template.
2. Use the Manufacturer’s Artwork Template
If your manufacturer provides an artwork template, use it.
A proper template may show:
- Finished bag dimensions
- Printable area
- Trim area
- Bleed area
- Safe zone
- Center line
- Handle position
- Seam location
- Front panel
- Back panel
- Gusset areas
This gives your designer a much more accurate working environment.
For example, a logo may look centered on a rectangular artboard but appear slightly off-center after the bag is sewn and assembled.
The template helps account for the physical construction of the bag before the artwork reaches production.
Best practice
Get the bag template first → design the artwork second.
Not the other way around.
3. Choose the Right File Format
For professional custom bag production, vector artwork is generally preferred, especially for logos, text, icons, and simple illustrations.
Common professional formats include:
- AI
- EPS
- SVG, when accepted by the manufacturer
High-resolution raster formats such as TIFF, PSD, JPG, and PNG may also be accepted depending on the printing process and supplier. Some suppliers specify 300 DPI for raster artwork at actual print size.
Why Vector Artwork Is Preferred
Vector artwork is built from mathematical paths rather than fixed pixels.
This means a logo can be enlarged or reduced without becoming pixelated.
For example:
A small company logo may need to be printed at 150 mm wide on a shopping bag.
If the logo is supplied as a low-resolution JPG, enlargement can produce blurry edges.
If it is supplied as vector artwork, the manufacturer can scale it while maintaining clean edges.
For logos and typography, vector is therefore usually the safest option.
4. Use High-Resolution Images
If your artwork contains photographs or raster images, resolution becomes important.
A common industry requirement is 300 DPI at the actual print size, although exact requirements vary by printing process and supplier.
For example, if a photograph needs to be printed at:
200 × 250 mm
the image should have enough original pixel information to maintain quality at that physical size.
Do not simply take a 72 DPI web image and change its resolution setting to 300 DPI.
That does not magically create additional image detail.
The original image itself needs sufficient resolution.
Avoid Using:
- Website screenshots
- Social media images
- Low-resolution product photos
- Small JPG logos downloaded from the internet
- Screenshots of logos
- Images copied from Word or PowerPoint
These files may look acceptable on a monitor but can produce poor results in production.
5. Convert Fonts to Outlines
Fonts are another common source of production problems.
If your artwork contains editable text, the factory may not have the same font installed on its computer.
The result could be:
- Missing fonts
- Substituted fonts
- Changed letter spacing
- Incorrect typography
- Altered text layout
To avoid this, convert fonts to outlines or curves before sending the final production file.
This turns the text into vector shapes.
For example:
Before:
“ABC BRAND” is editable text using a specific font.
After:
“ABC BRAND” becomes vector outlines.
The visual appearance remains consistent even if the manufacturer’s computer does not have the original font installed.
Many current bag-printing artwork specifications recommend outlining fonts before submission.
6. Confirm the Correct Color Mode
Color is one of the biggest sources of misunderstanding between designers and manufacturers.
Your monitor displays colors using light.
Printing uses physical inks or other printing materials.
Therefore, the color you see on your screen may not exactly match the finished bag.
For full-color printing, CMYK is commonly used.
For spot-color printing, manufacturers may request specific Pantone/PMS references.
Some printing suppliers explicitly require CMYK for four-color processes and Pantone or spot colors for certain screen-printing applications.
CMYK
CMYK stands for:
- Cyan
- Magenta
- Yellow
- Key/Black
It is commonly used for four-color printing.
Pantone
Pantone references can be useful when a brand needs a specific spot-color target.
For example, a company with strict brand guidelines may want its logo color to remain consistent across:
- Paper bags
- Non-woven bags
- Packaging boxes
- Cups
- Promotional materials
In that situation, provide the manufacturer’s preferred color reference and confirm how the color will be reproduced on the selected material.
7. Do Not Rely Only on RGB Screen Colors
RGB is designed for screens.
A bright RGB color may look extremely vivid on your monitor but cannot necessarily be reproduced in exactly the same way with physical printing.
This is especially important for:
- Neon colors
- Very bright greens
- Bright blues
- Highly saturated reds
- Certain fluorescent shades
If accurate brand color is important, discuss color matching with the manufacturer before production.
For important branding projects, a physical printed proof or sample is more reliable than judging color from a monitor alone.
8. Keep Important Elements Inside the Safe Area
The safe area is the zone where important design elements should remain safely away from edges, seams, and finishing areas.
Keep critical elements such as:
- Logo
- Company name
- Website
- Phone number
- QR code
- Product information
- Important text
away from:
- Bag edges
- Stitching
- Seams
- Handles
- Gussets
- Cutting areas
The exact safe distance depends on the bag construction and supplier template.
Some suppliers specify only a few millimeters of safe area, while others recommend larger margins around seams and finishing areas.
Therefore, always follow the manufacturer’s template rather than applying one universal margin to every bag.
9. Understand Bleed
Bleed is additional artwork extending beyond the intended finished area.
It gives the production process some tolerance if the material shifts slightly during printing or finishing.
The required bleed varies by supplier and production method.
For example, published artwork specifications from different non-woven bag printers range from approximately 2 mm to 5 mm or more.
This is why buyers should not simply assume:
“All bag artwork needs 5 mm bleed.”
Instead:
Ask the factory for the exact bleed requirement for your product.
10. Pay Attention to the Print Area
A common mistake is designing according to the full bag size rather than the actual printable area.
For example:
Bag size:
400 × 350 × 100 mm
does not necessarily mean:
Print area:
400 × 350 mm
The available print area may be smaller because of:
- Seams
- Handles
- Gussets
- Bag construction
- Printing equipment
- Required margins
Your manufacturer should confirm the maximum printable area before artwork is finalized.
Some suppliers provide downloadable templates specifically to prevent designers from using the wrong print dimensions.
11. Prepare Front and Back Artwork Separately
If the bag will be printed on both sides, clearly separate the artwork.
For example:
Front.pdf
Back.pdf
or provide a clearly organized multi-page PDF where:
- Page 1 = Front
- Page 2 = Back
Some production specifications explicitly request separate pages for front and back artwork.
This reduces the chance of:
- Wrong-side printing
- Artwork being rotated
- Front/back designs being mixed up
- Production staff misunderstanding the layout
For large orders, small file-management mistakes can become expensive mistakes.
12. Keep Different Colors and Elements Organized
For multi-color printing, your artwork should be organized clearly.
For example:
Layer 1: Background
Layer 2: Logo
Layer 3: Text
Layer 4: Graphic elements
For certain printing processes, separate color layers may be particularly useful because individual colors may require separate screens or plates.
Do not leave dozens of unnecessary hidden layers, unused objects, or random design elements in the final production file.
A clean production file is easier for the factory to check and less likely to create confusion.
13. Be Careful With Small Text
Small text can look perfectly readable on a large monitor.
The same text may become difficult to read once printed onto textured non-woven fabric.
This is especially important for:
- Contact information
- Legal text
- Product descriptions
- Websites
- QR codes
- Fine-print instructions
The exact minimum text size depends on the printing method, fabric, artwork, and supplier.
Some current bag-printing specifications recommend minimum text sizes and line thicknesses, but these values vary between production systems.
The safest approach is to ask the manufacturer for the minimum recommended text size before finalizing the artwork.
14. Avoid Extremely Thin Lines
Fine lines can disappear, break, or print inconsistently on a textured fabric surface.
This can be particularly problematic with screen printing.
For example, a logo containing:
- Hairline strokes
- Very thin borders
- Tiny decorative elements
- Fine typography
may need to be simplified before production.
Some published screen-printing specifications recommend minimum stroke widths and caution against details that are too fine for the selected process.
If your logo contains very fine details, ask the manufacturer to review it before approving the production file.
15. Be Careful With Gradients and Shadows
Gradients, transparency, shadows, and complex effects can create challenges for certain printing methods.
This does not mean gradients are impossible.
It means the artwork may need to be adapted according to the selected printing technology.
For example, traditional screen printing is generally more straightforward with solid colors and clean graphics, while other processes may be more suitable for complex full-color artwork.
If your artwork contains:
- Gradients
- Transparency
- Drop shadows
- Blending
- Photographic elements
tell the manufacturer before production.
They can determine whether the design should be modified or whether another printing method would be more appropriate.
16. Consider the Color of the Non-Woven Bag
The bag’s base color affects the appearance of the printed artwork.
This is especially important when printing light colors onto dark fabric.
For example, white artwork on a black or dark blue non-woven bag may require additional treatment or an underbase depending on the printing process.
The same logo can therefore look different on:
- White fabric
- Natural fabric
- Black fabric
- Red fabric
- Navy fabric
- Custom-colored fabric
Always evaluate the artwork together with the actual bag color.
17. Check QR Codes Before Production
QR codes are increasingly used on promotional and retail packaging.
If you plan to put a QR code on a non-woven bag, do not make it unnecessarily small.
Also check:
- Contrast
- Print sharpness
- Quiet zone around the QR code
- Final physical size
- Background color
- Printing method
Most importantly:
Test the QR code on a physical sample before mass production.
A QR code that scans perfectly from a digital file may perform differently when printed on a textured material.
18. Proofread Everything Before Approval
This sounds obvious.
It is also one of the easiest things to overlook.
Before approving the artwork, check:
Text
- Company name
- Product name
- Website
- Phone number
- Address
- Slogan
Visuals
- Logo
- Brand colors
- Icons
- Images
- QR codes
Layout
- Print position
- Front/back orientation
- Margins
- Safe area
- Handle clearance
- Seam clearance
Specifications
- Bag size
- Print size
- Number of colors
- Printing sides
Once the artwork enters mass production, correcting a spelling error becomes much more expensive than correcting it in the design file.
19. Request a Digital Proof or Physical Sample
Before mass production, ask the manufacturer to confirm the final artwork.
Depending on the project, this may include:
- Digital mock-up
- Digital proof
- Test print
- Physical sample
- Pre-production sample
For important B2B orders, a physical sample can be particularly useful because it lets you evaluate the actual relationship between the artwork and the non-woven material.
It can reveal:
- Color differences
- Print sharpness
- Logo positioning
- Scale
- Fabric interaction
- Fine-detail performance
Industry artwork guidelines commonly recommend reviewing a physical printed sample or strike-off for important branded orders.
20. Ask the Manufacturer About Color Matching
If your brand has strict color requirements, provide a clear color reference.
For example:
Brand Blue: Pantone XXXX C
is more useful than:
“Please make the blue match our website.”
Why?
Because website colors are displayed through screens, while physical printing depends on ink, material, printing process, and production conditions.
For major retail or corporate branding projects, discuss color matching before approving the production order.
Artwork Checklist for Custom Non-Woven Bags
Before sending your final artwork to the manufacturer, use this checklist:
| Artwork Item | Buyer Check |
|---|---|
| Bag template | Correct template used |
| Bag size | Confirmed |
| Print area | Confirmed |
| File format | AI/EPS/PDF preferred where applicable |
| Vector artwork | Used for logos and text where possible |
| Resolution | 300 DPI for raster artwork where required |
| Color mode | Confirmed with manufacturer |
| Pantone | Supplied when spot-color matching is required |
| Fonts | Outlined/converted to curves |
| Bleed | Manufacturer’s requirement followed |
| Safe area | Important elements kept away from edges/seams |
| Front artwork | Correct |
| Back artwork | Correct |
| Print colors | Confirmed |
| Fine lines | Checked |
| Small text | Checked |
| QR code | Tested |
| Bag color | Considered |
| Digital proof | Approved |
| Physical sample | Approved when required |
What File Package Should You Send to the Factory?
For a professional B2B order, your artwork package might include:
01_Bag_Template.ai
02_Front_Artwork.ai
03_Back_Artwork.ai
04_Print_Ready.pdf
05_Color_Reference.pdf
06_Logo_Reference.pdf
You do not necessarily need to send all of these files for every order.
The exact file requirements depend on the manufacturer’s production system.
However, the principle is simple:
Make it easy for the production team to understand exactly what needs to be printed.
Clear files reduce questions, revisions, and production risk.
Common Artwork Mistakes That Delay Production
Mistake 1: Sending a Screenshot
A screenshot is not a professional production file.
Mistake 2: Using a Low-Resolution Logo
A small JPG logo can become blurry when enlarged.
Mistake 3: Forgetting to Outline Fonts
This can result in font substitution.
Mistake 4: Designing Without a Bag Template
The artwork may not fit the actual printable area.
Mistake 5: Using RGB Without Checking Color Requirements
The final printed color may differ from the screen.
Mistake 6: Putting the Logo Too Close to the Seam
The logo may be affected by stitching or finishing.
Mistake 7: Making Text Too Small
Fine details may become difficult to read on non-woven fabric.
Mistake 8: Ignoring the Printing Method
Different printing technologies have different artwork limitations.
Mistake 9: Approving Only a Digital Mock-Up
The physical result may look different from the screen.
Mistake 10: Changing Artwork After Final Approval
Late changes can affect production schedules and costs.
A Practical Artwork Workflow for B2B Buyers
A reliable workflow looks like this:
Step 1: Confirm the bag specifications.
↓
Step 2: Ask the manufacturer for the exact artwork template.
↓
Step 3: Confirm the printing method.
↓
Step 4: Prepare vector artwork whenever possible.
↓
Step 5: Set the correct color mode and color references.
↓
Step 6: Check print dimensions, bleed, and safe areas.
↓
Step 7: Outline fonts.
↓
Step 8: Check small text, thin lines, gradients, and QR codes.
↓
Step 9: Submit the production file.
↓
Step 10: Review the digital proof or physical sample.
↓
Step 11: Give final approval.
↓
Step 12: Start mass production.
This workflow can reduce unnecessary artwork revisions and help keep the production schedule on track.
Artwork Requirements and Printing Method Go Together
One important lesson for buyers is that there is no universal artwork specification for every custom non-woven bag.
The correct requirements depend on:
Bag material + GSM + bag color + construction + printing method + artwork + print area
For example, a simple one-color screen-printed logo may have different requirements from a detailed full-color design printed through a heat-transfer or laminated process.
That is why the safest approach is to confirm the artwork specifications with the manufacturer before finalizing the design.
Custom Non-Woven Bags for Business Branding and Wholesale Supply
If you are ordering custom non-woven bags for a retail chain, supermarket, promotional campaign, trade show, event, or wholesale project, artwork preparation should be part of the purchasing process from the beginning.
The right combination of material, GSM, size, construction, printing method, artwork, and finishing can have a major impact on the final product.
For business and wholesale requirements, you can explore our Custom Non-Woven Bags for Business Branding and Wholesale Supply and discuss your bag specifications, artwork, quantity, printing requirements, and target delivery date with the manufacturer.
Final Thoughts
Preparing artwork for custom non-woven bag printing is not simply about creating an attractive design.
It is about creating a production-ready design.
Before sending your artwork to a manufacturer, make sure you have:
- The correct bag template
- The correct print area
- Vector artwork where possible
- High-resolution images
- Correct color specifications
- Outlined fonts
- Proper bleed
- A suitable safe area
- Correct front and back files
- Readable text
- Appropriate line thickness
- Correct bag color considerations
- A final proof or sample approval
Most importantly, communicate with the manufacturer before the artwork is finalized.
A few minutes spent confirming the production template and printing requirements can prevent days of revisions later.
For B2B buyers, good artwork preparation is not just a design advantage. It is a production advantage.